Pages

Sunday 30 July 2023

Aldi Ferrex Gas Soldering Iron - Good for Hot Air Soldering

I went and brought a second one of these today. Much better value than my Iroda Gas Soldering Iron from Altronics. It lights easier, gets hotter and  works out about half the price. 

I use it as a cordless hot air gun and it's very good. As a soldering iron I can't say but given the heat this puts out it's probably good for that too.

Ferrex Mini Soldering Torch Kit

Friday 28 July 2023

Flux "Testing" and Soldering Methods

Recently I watched in amazement a YouTube video of someone testing a large collection of soldering fluxes. I applaud the poster for testing the evangelical claims for certain brands of flux, but please use a technique that is meaningful. 

The first failure is trying to drag solder with what is clearly stale solder on the tip. See how the outside of the iron has slag on it? It wasn't cleaned before the test. And the hollowed tip exacerbates the problem because it holds a pool of stale solder. The exact opposite of what you want and the only tips I have like that are in my workshop bin. No wonder the resulting solder joints were so poor. 

The technique is also dubious. I never put a pool of solder on the tip to drag solder because the flux burns off. As an example of how far you can take this fresh solder approach you can, after tacking the part down, hold your fine solder wire so that it lies alongside the row of pins and pads. Then push the tip of the iron along the row of pins which melts the solder at the same time as the tip wipes across the pins. The result is fresh flux already in the solder doing it's job.

But yes, flux makes it easier and neater when drag soldering. Just not the way this was done. Stop and consider how much flux you need. Solder already contains flux, say 3%. Slapping on a teaspoon of flux is just ludicrous. My normal technique when drag soldering is to use a small paintbrush, trimmed to make it stiffer, and flux sitting in a suitable container. See below where the flux at the bottom of the container came from one of those cheap Chinese flux syringes. I am also trying a eyelash brush normally used for makeup because these are really cheap in a pack of 50. But even the most careful application of flux will still be more flux than is needed when drag soldering.


Sometimes I use a modified technique with a thicker solder wire. Stick the wire up into the flux and then as you push the tip along the pins pull the solder wire along the row of pins in front of the pool of solder forming on the tip. It takes a bit of practice but it avoids having to apply flux to the board first.

Any flux I have used was intended for electronics use and worked fine. Even rosin dissolved in metho works but I don't like how everything feels tacky afterwards because I'm clumsy. If you're slapping on gallons of flux like the video shows then yes you will find at times the fumes troublesome. But get your technique right and fumes become much less of an issue, if at all.

Ok, lets move on to soldering some surface mount parts. I was testing an Aldi butane soldering iron as a hot air gun and it worked well. I have three different butane hot air guns now and they have the advantage over the soldering station hot air gun in that there is no air flow. Something to keep in mid if your surface mount parts are blowing off the board at the slowest air setting!

I use a reflow technique based on wire solder and flux, not solder paste.

Step 1 - melt some solder onto the pads


Step 2 - brush some flux on


Step 3 - position parts - close enough!


Step 4 - Apply heat. I usually sit the board on my hot plate and use my soldering station hot air gun. But today it was just the butane powered hot air "pencil". The large inductors were too difficult so I ended up doing those with a soldering iron afterwards. on the hot plate they would have been easy to solder.

Step 5 - Touch up. I was rushing this because the whole purpose was to test the hot air pencil I brought so I didn't take as much care as usual. Not enough solder on a couple of joints but easily fixed with the iron.

Before Touch-up.

So nothing very challenging with this board but the hot air Aldi special worked very well. I'll buy another one this weekend. It works better than my Iroda butane powered soldering iron in this application and it doesn't blow parts around.


I repeated this with a USB charging connector which are difficult to solder with an iron though it can be done. Missed the ground pad on the connector but I show this because you can see what happens with too little solder. No pre-tinning of connector and be careful if you try to clean the pins (I don't) - once they bend you create problems getting them flat on the pads when soldering.


Let's do it again with more solder on the pads this time:


Final result after a quick clean with metho and cotton wool ear bud.

So there you have it - flux is your friend but you need far less than the you tubers use. And be critical when watching video's because all you're watching is opinion and ego. It's rarely the right way to do things. As someone who has used a soldering iron for over 50 years now I hope these couple of idea's get you thinking.


Footnote:

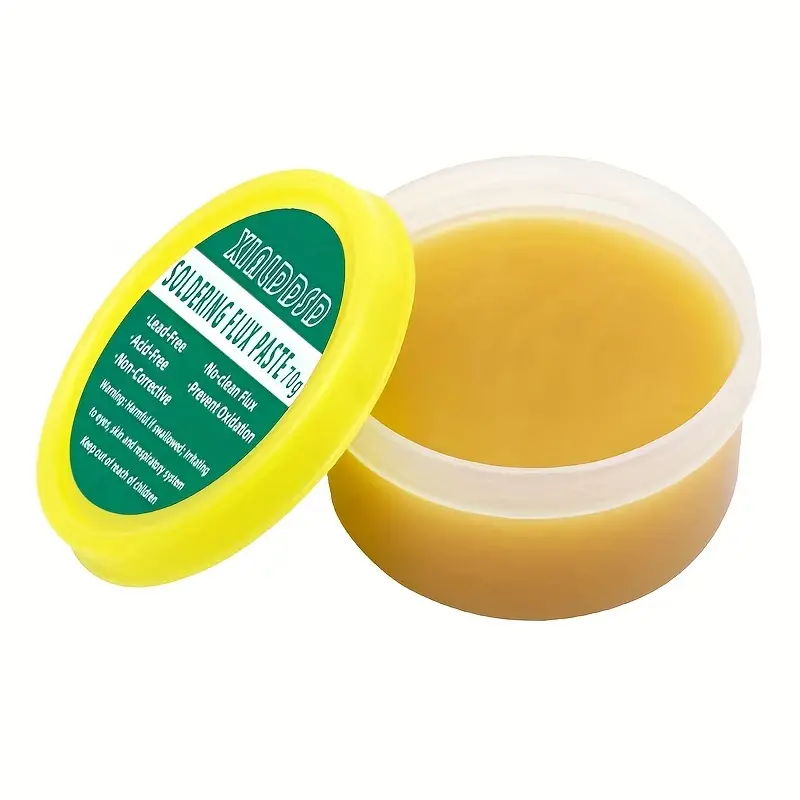
If you're buying flux I found that Temu is a good source. It's cheaper than other online sources though a bit annoying at times. Something like the following is what I use since I don't need another container to squirt the flux from a syringe into.

And if you do click the picture I might get some sort of referral bonus. While I have my doubts I'll get anything, if I do then I will stop the ads on this blog.

1pc soldering paste mild rosin environmental soldering paste flux pcb ic parts welding soldering gel tool for arrow metalworking 1

Friday 21 July 2023

The Rat Flasher - Evolution continues

So I got tired of recharging the Rat Flasher every couple of days. A software tweak so it only runs at night with 16 seconds of flashing followed by 16 dormant seconds stretched the battery life out to 5 nights. It still seems to be deterring the rats.

After a fair amount of thought I have devised a way to make it easy to install and keep running several of these giving me better coverage of the roof space. More on that in a few weeks when I can show you a picture of a prototype.

Sunday 9 July 2023

The Rat Flasher - Adventures with Roofspace Vermin : Trial Results

Results

Night     Result

1              Reduced activity but at least one critter still present.
                Appeared to move along a "sheltered" recess.
                Noticed again shortly thereafter active in an area the strobe was blocked by air conditioner .

2              One instance of brief activity noticed by wife. Dark part of roofspace

3              No activity noticed

4.             No activity noticed

5              Brief activity noticed in southwest corner of roof

Yellow dot : approx position of Rat flasher

White arrow : direction of flash

Conclusion:

A suitable strobe light appears to deter rats from entering an area. One "Rat Flasher" does a good job but 300m2 of roof space is a big ask. I am surprised that it worked as well as it did.


Description of Rat Flasher prototype:

Powered by a single 26700 LiFePO4 battery.

STM8S003 running STM8 eForth which allowed timing parameters to be quickly updated.

 2 x 3W White CoB leds facing in same direction, about 180 degree coverage

Leds dissipating 3.5 Watts 

Yes, it's very bright and annoying. 

I was recharging every day but every second day would suffice.


Next Step

Double the number of leds and orientate for 360 degree coverage

Adjust circuit for additional leds and revise PCB

Bigger battery!


Saturday 8 July 2023

How Good are Chip Resistors as Low Power 50 Ohm Terminations?

I purchased some 49.9 Ohm 1206 resistors to use as low cost, low power terminations or dummy loads in experiments. It turns out that when I measured them with the nanoVNA they were very good up to 150MHz and usable to at least 70cm. If it was non-critical then I'd use them at 23cm also.


Two samples of 49R9 1206 Chip Resistors


Wednesday 5 July 2023

The Rat Flasher - Adventures with Roofspace Vermin


Image by https://www.furaffinity.net/user/mrweirdo6472/

A rat in a trench coat.


Not that kind of flasher! The kind with really bright LEDS.  

I've been playing around with backup lighting for my workshop and house. That led me to test a few LED COB's in a torch. One night I was banished to my office recliner with my cold where I lay awake. When I hold the button down on my torch it flashes. I didn't have to do this often to realise how annoying it is. 

Tonight, the Rat Flasher get's a proper test in the roof space. A super bright 60ms flash once per second. All night. I'll report if I hear any critters after testing for a few nights.

Li Ion Battery Charging - Interim Results for Float Charging after 180 days or so

The background is I wanted to be able to put 18650 cells in a charger until I needed them. Please refer to earlier posts where I describe the charging circuit used and the lower charging voltage being used. A set and forget lifestyle choice. Given the sheer amount of nonsense promulgated by self appointed experts repeating each other's gospel I decided to test if such a charging regime was going to damage cells.

I started with rubbish 18650 cells, the kind promoted as holding more energy than a hydroelectric dam. These cells had been abused in my torch and seemed worthy of sacrifice. 

I noticed by accident that cells left resting see an increase in terminal voltage over time. I started testing how much additional capacity could be obtained by resting for a day at a time and if this different discharge regime changed the trend in results to date.

 Battery A 3.93V Float

I started with this battery, one of a batch of the worst 18650 batteries I have ever touched. Sacrificing one for testing was a given. Over time there is a clear downward trend in the tested capacity, having fallen by 17% when left in my CC/CV charger at 3.93 volts. Observation 26 represents the capacity when fully charged to 4.2V and confirms I was giving up a reasonable amount of capacity compared to my CC/CV charger.

Battery B 4.03V Float


This 18650 battery appeared to be deteriorating until I tested after resting. Inconclusive results at present.

Battery C

Appears to have been lost.

Battery D


Battery D does not appear to have suffered any significant degradation by leaving it in the CC.CV charger at 4.0 volts.

Battery E - Pouch Cell Salvaged from Cheap Android Tablet

Downward trend can be observed.


Battery F - Pouch Cell Salvaged from Cheap Android Tablet

Downward trend can be observed.


Interpretation of results

Because the batteries were already end of life status the results are inconclusive. At best there is tentative support for the claim that leaving Li-ion cells on charge with a reduced float voltage does lead to reduced cell capacity. Given all the possible sources of error in my approach I'm not yet convinced that floating at 3.9v damages the cells. 

Perhaps Battery D, which showed no deterioration, was a relatively new battery. There was no way of knowing. But I cannot rule out the deterioration where noticed was simply the result of testing with damaged or end of life cells.

The move from summer into an unusually cold winter in this location did not appear to make any significant difference. Spring type battery holders have unreliable contact resistance and plugs with solder connections would give more robust outcomes.


Next steps

This initial testing revealed where the shortcomings in my approach were. To bring more rigor to the testing I will run future trials as follows:

Take a pair of brand new batteries. One, let's denote it as x1, will be subject to the CC/CV regime at around 3.9V. The second, say x2, will serve as a reference. The capacity of x1 and x2 will be initially tested fully charged. 

I then put x1 in my CC/CV charger and left there until the capacity is tested, about weekly. After testing  x1 goes back into the CC/CV charger.

Meanwhile, after testing x2 will be charged to 3.6 volts before removal from the charger and stored. Every couple of months it will be then fully charged and tested before re-charging to 3.6 volts and storage.

I will revert to testing capacity by discharging to 3.0 volts since the capacity tester defaults to the value. If I don't see any degradation in the first new pair of batteries to be tested then I'll automate the process and extend it.